How to manage a self-hosted VPS using a self-managed panel.
VPS Management Made Easy
Most VPS providers only offer basic SSH access. However, if your service includes a Self-Management Panel like the one shown below, it can make managing your VPS much easier — without the need to create support tickets or wait for assistance from the support team.
To get started:
Click the Manage button for your VPS
Log in to your client area
Go to Services
How to Manage Your VPS from the Client Area
- Login to Your Client Area
Start by logging into your client area. Once logged in, go to Services, find your VPS, and click the Manage button. - Access the Self-Management Panel
You’ll now see the VPS Self-Management Panel.
(Here’s a screenshot for reference)
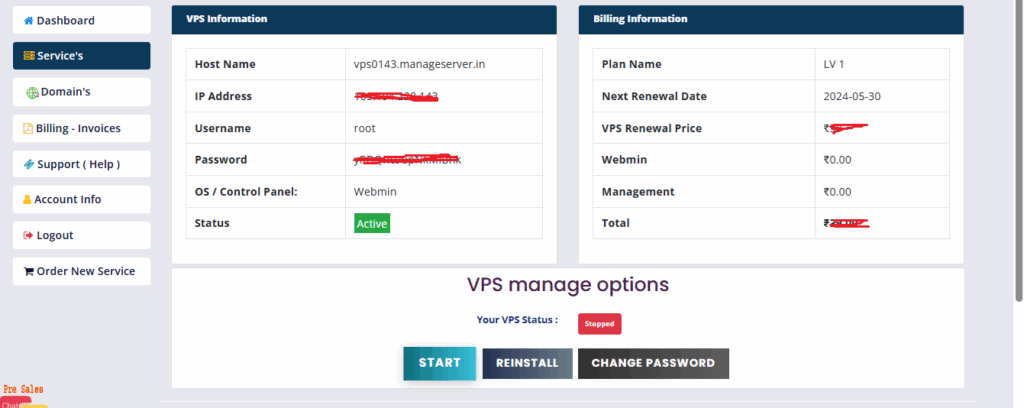
Key Features of the Self-Management Panel
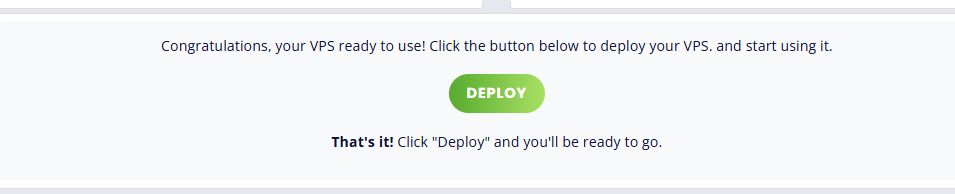
- One-Click VPS Deployment
If you’ve just ordered a new VPS, simply click Deploy.
The setup process takes approximately 10 minutes.
After deployment, you will get root access and can connect via SSH or CMD.
- Start & Stop VPS
You can easily stop your VPS by clicking the Stop button.
To start it again, just click Start — it’s that simple.

- Force Stop (If Needed)
If your VPS does not shut down properly using the standard method, click Force Stop to shut it down forcefully.

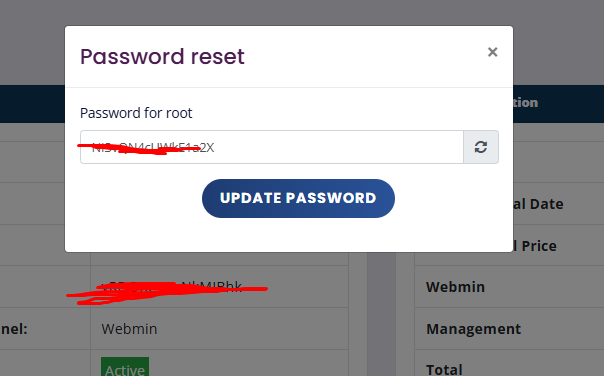
- Reset VPS Password Without Logging In
Need to reset your root password? Just click Reset Password.
Important: Make sure to stop the VPS before resetting the password.
After resetting, start the VPS again and use your new password.

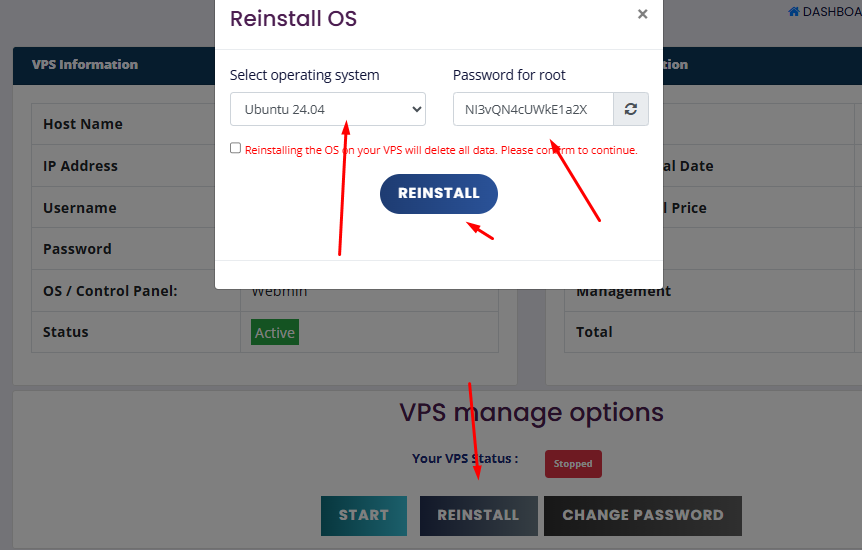
Reinstall Operating System (OS)
Want to reinstall your VPS for any reason?
Simply click Reinstall, choose your desired OS, and set a new password.
Click to confirm and wait 10 to 15 minutes — your VPS will be ready with a fresh installation.