How to Fix “403 Forbidden Error” on Your Website
The 403 Forbidden Error is one of the most common website errors that prevent users from accessing a webpage. This error occurs when the server denies permission to access a resource. In this guide, we’ll cover the causes and step-by-step solutions to fix the 403 Forbidden Error on your website.
What Causes the 403 Forbidden Error?
Before fixing the issue, it’s important to understand the common causes of a 403 Forbidden Error:
- Incorrect File or Directory Permissions – The server may block access if permissions are misconfigured.
- Corrupt .htaccess File – Errors in the
.htaccessfile can cause access restrictions. - IP Restrictions – Your hosting provider or security plugins may be blocking access based on IP addresses.
- Faulty Plugins or Security Settings – Some plugins (especially security-related ones) can accidentally restrict access.
- Missing Index Page – If your website doesn’t have an
index.htmlorindex.phpfile, the server may deny access.
How to Fix the 403 Forbidden Error
1. Check and Reset File Permissions
Incorrect file permissions can cause the 403 Forbidden Error. Follow these steps to fix them:
- Connect to Your Website via FTP using FileZilla or cPanel File Manager.
- Locate the Public Directory (
public_htmlorwww). - Set File and Folder Permissions:
- Directories should be 755 (read-execute for all, write for owner).
- Files should be 644 (read-write for owner, read-only for others).
- Apply the changes and check if the error is resolved.
2. Fix Corrupt .htaccess File
A misconfigured .htaccess file may cause the error. To fix it:
- Access the Root Directory via FTP or cPanel.
- Find the
.htaccessFile and rename it to.htaccess_backup. - Check Your Website – If it loads correctly, generate a new
.htaccessfile by:- Logging into WordPress Dashboard > Settings > Permalinks > Click Save Changes.
3. Disable Security Plugins
Some security plugins can mistakenly block users from accessing pages.
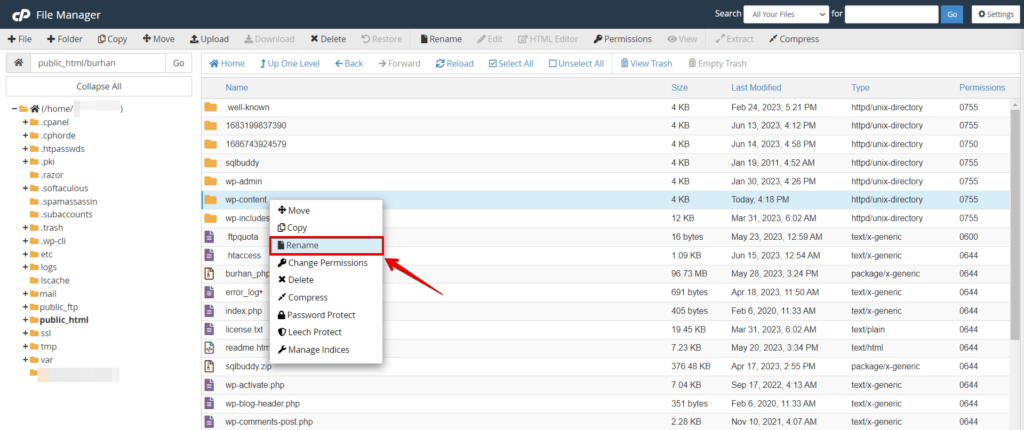
- Login to cPanel or FTP and navigate to
wp-content/plugins. - Rename the Security Plugin Folder (e.g.,
wordfencetowordfence_disabled). - Check Your Website – If it works, reinstall or adjust the plugin settings.
4. Check IP Restrictions in .htaccess
Your .htaccess file may contain rules that block certain IPs.
- Open the
.htaccessfile and look for lines like:deny from all allow from 192.168.1.1 - Remove or modify restrictive rules.
- Save the file and test your site.
5. Ensure an Index Page Exists
A missing index.html or index.php file can trigger a 403 Forbidden Error.
- Check the Root Directory (
public_html). - Ensure an
index.htmlorindex.phpFile Exists. - If missing, upload a new index file.
6. Clear Browser Cache and Cookies
If your website is working for others but not for you, clear your browser cache:
- Google Chrome: Press
Ctrl + Shift + Delete> Clear Cache and Cookies. - Firefox & Edge: Similar process under settings.
7. Contact Your Hosting Provider
If none of the above solutions work, your host might have applied restrictions. Contact your hosting provider to check for:
- ModSecurity Blocks
- Server Restrictions
- IP Blocks
Final Thoughts
A 403 Forbidden Error can be frustrating, but it’s usually caused by permission settings, .htaccess issues, or security configurations. By following these steps, you can quickly diagnose and fix the problem to restore access to your website.